

Insulated roof panel installation starts with purlin spacing and fixing details checked against the actual panel, frame and local loads. Send the roof geometry, support material, spacing and site conditions before approving a panel schedule. Do not infer an allowable span or walking surface from overall panel depth.
In this guide
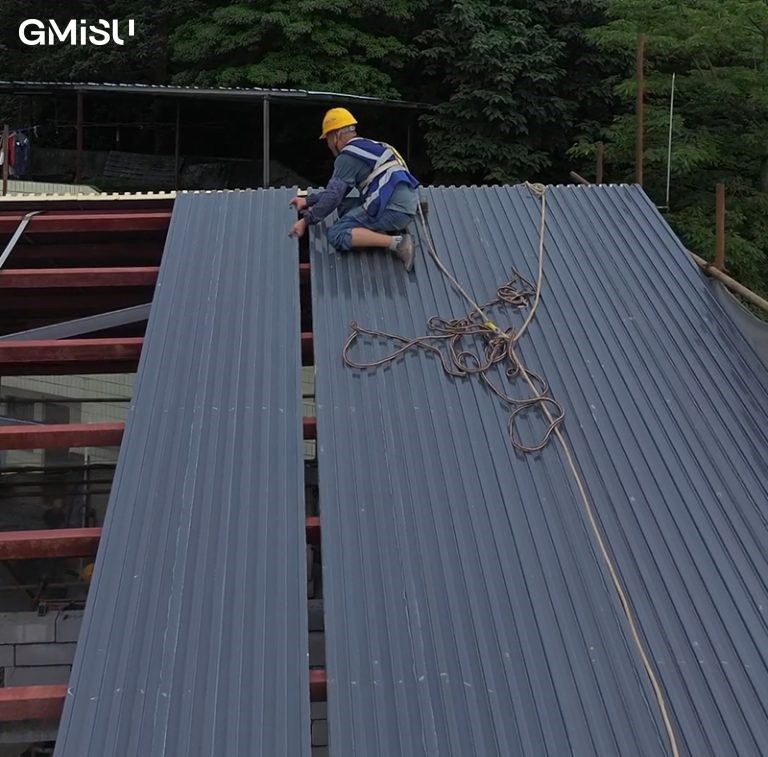
Before insulated roof panel installation begins
Approve a roof plan showing slope lengths, effective coverage, panel direction, supporting members and every junction. Mark wall connections, ridges, eaves, rooflights and gutter outlets. The drawing should identify the chosen panel profile and the corresponding fittings, rather than leaving the installer to choose from unrelated details on site.
Reconcile delivered panel lengths, quantities and accessories with the approved schedule. Record damage before unloading, protect coated surfaces and arrange handling for the actual sheet length and weight. A panel that arrives on site is not permission to walk on it; access and lifting methods need their own plan.
Purlin spacing and roof panel fixings: what to confirm
| Input | What to provide | Why it matters |
|---|---|---|
| Panel construction | Exact profile, top/bottom aluminum skin thickness and panel length | Section stiffness and connection geometry differ between configurations |
| Supports | Purlin material, centre spacing and single- or multi-span layout | Support continuity and fixing substrate affect the assembly |
| Site and loads | Project location, building height, local wind/snow requirements and access plan | Field, edge and corner conditions can require different details |
| Roof geometry | Slope, overhangs, openings, gutters and wall junctions | Drainage and junctions must be designed with the supporting frame |
Engineering checks that can reduce the spacing
- Wind uplift, especially at roof edges and corners where negative pressure can be substantially higher than field zones
- Snow load, maintenance access and other positive live loads that increase mid-span deflection
- Aluminum skin thickness and profile geometry, which affect section stiffness
- Single-span versus continuous multi-span support conditions
- Fastener pull-out resistance, purlin material, connection details and local code requirements
Common installation sequence
- 01
Confirm the roof layout
Review panel direction, support spacing, roof slope, drainage, penetrations and edge details before production.
- 02
Prepare the supporting structure
Check line, level, spacing and fixing suitability before lifting panels.
- 03
Engage panel joints
Align the tongue-and-groove or interlocking edges without damaging the protective surface film.
- 04
Install the specified fixings
Use the approved screws and connectors at the required support locations. Confirm whether the selected profile uses concealed or exposed fixings; do not assume one arrangement applies to every product.
- 05
Complete weatherproofing
Apply sealant and custom flashings at ridges, eaves, walls, sides, corners and penetrations.
- 06
Inspect the finished roof
Check joints, fixings, drainage routes, surface condition and all weatherproofing details.
Available installation accessories
- Flashings
- Ridge caps, eave trims, wall flashings and side trims
- Drainage
- Gutters and downpipe systems
- Fixing
- Screws, connectors and sealant
- Documentation
- Project installation drawings
Gutters, flashings and the final roof inspection
Coordinate the roof edge with the gutter so water has a defined path through outlets and downpipes. Check ends, corners, connectors and supports as part of the same schedule. Rainfall design, outlet capacity and fixing details belong to the selected drainage system and project, not a universal gutter spacing rule.
Inspect panel engagement, specified seals, wall and ridge terminations, penetrations and drainage together. Record any damaged coating, incomplete fittings or deviations from the drawing for resolution before handover. Agree protective-film removal and maintenance instructions with the supplier rather than leaving film indefinitely on exposed surfaces.
Keep the final drawings, material list and inspection records with the project. If water subsequently appears below the roof, these records help distinguish a junction or drainage issue from condensation and identify the correct replacement components.
Project-specific structural design
GMiSU can supply panel information for the project review. Final spans, deflection limits, wind and snow loads, fastener pull-out capacity and access arrangements require assessment by the responsible structural professional. Do not use this guide as permission to walk on a panel or omit frame reinforcement.
Pre-order installation checklist and handover
An insulated aluminum roof panel installation checklist starts with an approved roof drawing revision and length schedule. Cross-reference each eave, ridge, wall junction, penetration and exposed end to its flashing or accessory. Confirm the panel-specific fixing layout and support documentation before cutting or delivery.
Assign responsibility for approving local substitutions of fixings, sealants and accessories. Send bundle and lifting information to the installer before arrival. At handover, retain inspection results, approved changes, care instructions and unresolved items with named responsibilities. A concealed or snap-lock joint description alone does not establish a complete fixing design.
Confirm the right panel and specification with GMiSU.
Send your drawings, dimensions, quantity, color, destination and target schedule for project-based recommendations.